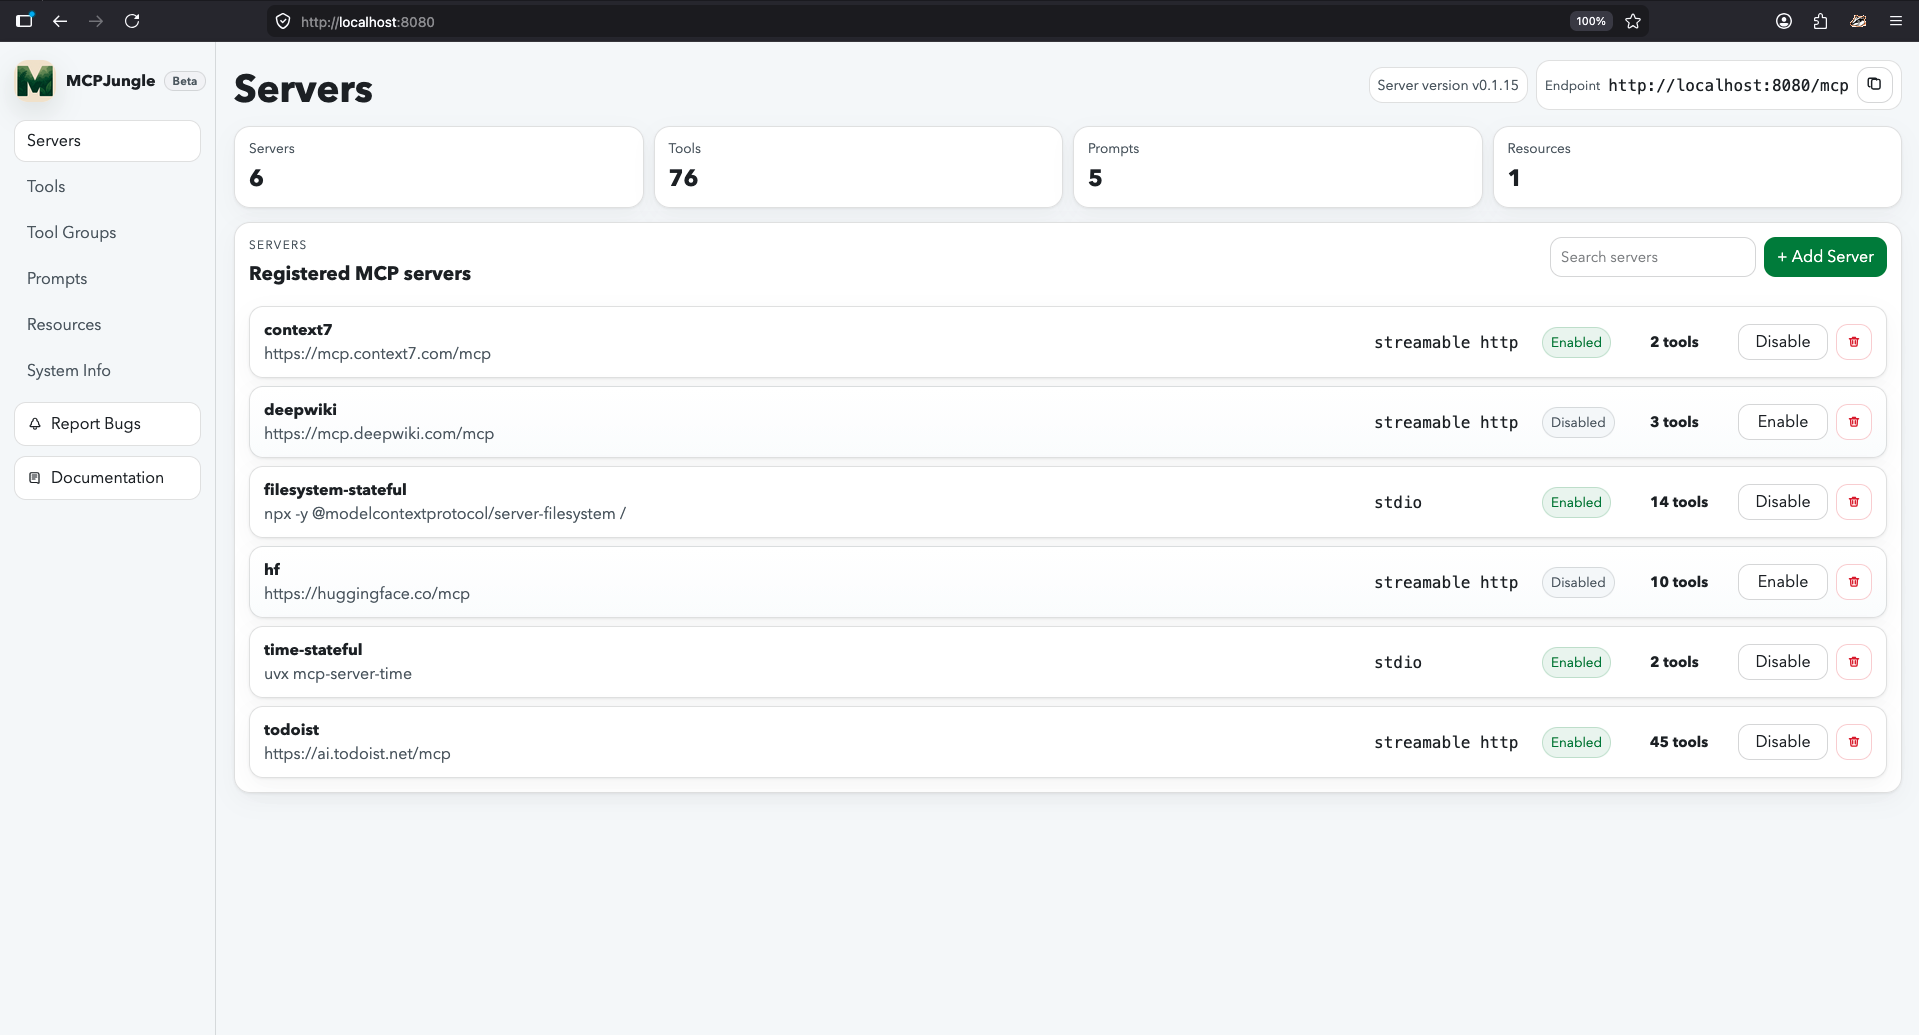
MCPJungle is a self-hosted MCP gateway for developers and teams who want to manage multiple MCP servers without scattered client configurations, duplicated setup, or inconsistent access control.
Use it locally to keep your personal MCP setup clean, or run it as shared infrastructure for a team with centralized discovery, access control, and observability.

Instead of wiring every MCP server into every AI client, register your servers once in MCPJungle and let Claude, Cursor, Codex, or your own Agents connect to a single MCP endpoint.
Why MCPJungle?
MCP is powerful, but managing many MCP servers gets messy fast.
Without a gateway:
- 🔌 Every client needs its own MCP server configuration
- 🧩 Tools, prompts, and resources are scattered across different servers
- 🔐 Access control is duplicated or missing
- 👥 Teams have no shared view of available MCP tools
- 🛠️ Local setups become hard to reproduce
MCPJungle gives you a single control point:
- 🌐 One MCP endpoint for Claude, Cursor, Copilot, and custom agents
- 🗂️ One place to register and manage MCP servers
- 🔎 Unified discovery for tools, prompts, and resources
- 🎛️ Optional tool groups to expose only the tools a client should see
- 📊 Simple access-control and observability hooks for shared deployments
Start with a local setup. Scale to a shared team gateway when you need it.
Documentation
Mcpjungle documentation has a new home: https://docs.mcpjungle.com.
Please prefer the docs site over this README for the latest guides, reference, and operational details.
Your AI Clients can also access the docs using its MCP server https://docs.mcpjungle.com/mcp!
Quickstart
This quickstart guide will show you how to:
- Start the mcpjungle server locally using
docker compose - Add an MCP server in mcpjungle
- Connect your Claude Desktop to mcpjungle to access your MCP tools
Start the server
Fetch the docker-compose.yaml and start the mcpjungle server:
curl -O https://raw.githubusercontent.com/mcpjungle/MCPJungle/refs/heads/main/docker-compose.yaml
docker compose up -dThis exposes mcpjungle's streamable http mcp server at http://localhost:8080/mcp by default.
Add an MCP server
- Download the
mcpjungleCLI on your local machine either using brew or directly from the Releases Page.
brew install mcpjungle/mcpjungle/mcpjungle- Add the context7 MCP server to mcpjungle using the CLI:
mcpjungle register --name context7 --url https://mcp.context7.com/mcpYou should see output similar to this:

Connect to mcpjungle
In your Claude Desktop, add the configuration for mcpjungle MCP server:
{
  "mcpServers": {
    "mcpjungle": {
      "command": "npx",
      "args": [
        "mcp-remote",
        "http://localhost:8080/mcp",
        "--allow-http"
      ]
    }
  }
}Once you have added the configuration, try asking claude something simple:
Use context7 to get the documentation for `/lodash/lodash`Claude will then attempt to call the context7__get-library-docs tool via MCPJungle, which will return the documentation for the Lodash library.
You now have a working MCP setup with a single unified endpoint!
Next, explore the complete documentation at docs.mcpjungle.com and the public roadmap.
<details> <summary>Legacy README reference</summary>
📋 Table of Contents
- Installation
- Usage
- Limitations
- Contributing
Installation
MCPJungle is shipped as a stand-alone binary.
You can either download it from the Releases Page or use Homebrew to install it:
brew install mcpjungle/mcpjungle/mcpjungleVerify your installation by running
mcpjungle version[!IMPORTANT] On MacOS, you will have to use homebrew because the compiled binary is not Notarized yet.
MCPJungle provides a Docker image which is useful for running the registry server (more about it later).
docker pull ghcr.io/mcpjungle/mcpjungleUsage
MCPJungle has a Client-Server architecture and the binary lets you run both the Server and the Client.
Server
The MCPJungle server is responsible for managing all the MCP servers registered in it and providing a unified MCP gateway for AI Agents to discover and call tools provided by these registered servers.
The gateway itself runs over streamable http transport and is accessible at the /mcp endpoint.
Running inside Docker
For running the MCPJungle server locally, docker compose is the recommended way:
# docker-compose.yaml is optimized for individuals running mcpjungle on their local machines for personal use.
# mcpjungle will run in `development` mode by default.
curl -O https://raw.githubusercontent.com/mcpjungle/MCPJungle/refs/heads/main/docker-compose.yaml

docker compose up -d

# docker-compose.prod.yaml is optimized for orgs deploying mcpjungle on a remote server for multiple users.
# mcpjungle will run in `enterprise` mode by default, which enables enterprise features.
curl -O https://raw.githubusercontent.com/mcpjungle/MCPJungle/refs/heads/main/docker-compose.prod.yaml

docker compose -f docker-compose.prod.yaml up -d[!NOTE] The
enterprisemode used to be calledproductionmode. The mode has now been renamed for clarity. Everything else remains the same.
This will start the MCPJungle server along with a persistent Postgres database container.
You can quickly verify that the server is running:
curl http://localhost:8080/healthIf you plan on registering stdio-based MCP servers that rely on npx or uvx, use mcpjungle's stdio tagged docker image instead.
MCPJUNGLE_IMAGE_TAG=latest-stdio docker compose up -d[!NOTE] If you're using
docker-compose.yaml, this is already the default image tag. You only need to specify the stdio image tag if you're usingdocker-compose.prod.yaml.
This image is significantly larger. But it is very convenient and recommended for running locally when you rely on stdio-based MCP servers.
For example, if you only want to register remote mcp servers like context7 and deepwiki, you can use the standard (minimal) image.
But if you also want to use stdio-based servers like filesystem, time, github, etc., you should use the stdio-tagged image instead.
[!NOTE] If your stdio servers rely on tools other than
npxoruvx, you will have to create a custom docker image that includes those dependencies along with the mcpjungle binary.
Production Deployment
The default MCPJungle Docker image is very lightweight - it only contains a minimal base image and the mcpjungle binary.
It is therefore suitable and recommended for production deployments.
For the database, we recommend you deploy a separate Postgres DB cluster and supply its endpoint to mcpjungle (see Database section below).
You can see the definitions of the standard Docker image and the stdio Docker image.
Running directly on host
You can also run the server directly on your host machine using the binary:
mcpjungle startThis starts the main registry server and MCP gateway, accessible on port 8080 by default.
Shutting down
It is important that the mcpjungle server shuts down gracefully to ensure proper cleanup.
The recommended way to stop the server process is to send a SIGTERM signal to it.
Database
The mcpjungle server relies on a database and by default, creates a SQLite DB file mcpjungle.db in the current working directory.
This is okay when you're just testing things out locally.
If you do not provide PostgreSQL configuration or a custom SQLite path, mcpjungle uses ./mcpjungle.db.
You can optionally set a custom file path for the SQLite DB file:
mcpjungle start --sqlite-db-path ./.mcpjungle.db

# or
export SQLITE_DB_PATH=/path/to/.mcpjungle.db
mcpjungle startNOTE: Deleting that SQLite file removes all registered server data and other MCPJungle state stored in it.
For more serious deployments, mcpjungle also supports Postgresql. You can supply the DSN to connect to it:
# You can supply the database DSN as an env var
export DATABASE_URL=postgres://admin:root@localhost:5432/mcpjungle_db

#run as container
docker run ghcr.io/mcpjungle/mcpjungle:latest

# or run directly
mcpjungle startYou can also supply postgres-specific env vars or files if you don't prefer using the DSN:
# host is mandatory if you're using postgres-specific env vars
export POSTGRES_HOST=localhost
export POSTGRES_PORT=5432

export POSTGRES_USER=admin
export POSTGRES_USER_FILE=/path/to/user-file

export POSTGRES_PASSWORD=secret
export POSTGRES_PASSWORD_FILE=/path/to/password-file

export POSTGRES_DB=mcpjungle_db
export POSTGRES_DB_FILE=/path/to/db-file

mcpjungle startClient
Once the server is up, you can use the mcpjungle CLI to interact with it.
MCPJungle currently supports MCP servers using stdio and Streamable HTTP Transports.
[!NOTE] Support for SSE (server-sent events) also exists but is currently not matu
…